31 December 2015

2015 - The Year that was ...

January
Bali Wedding Star Quilt is finished
- well the top anyway and SO happy to hand it over to Desley 
to turn into a masterpiece!


February
Not content to just make ONE Judy Niemeyer Quilt,
I continued to send myself batty working on the large Mariner's Compass
 for my DS#2 


March
I got sidetracked and started Esther Aliu's 2015 BOM "Oma's Blues"
but true to form I could resist tweaking the pattern and promptly renamed it
"Esther's Oma lives in Leesa's Dutch Cottage"
(a reference to the 2 Melbourne based designers -
Pattern by Esther Aliu and Fabric by Leesa Chandler)


April
White Glove Duty at the Australian Quilt Convention
in the most beautiful venue ever -
The Royal Exhibition Buildings in Carlton


May
Looking back May was busy... 
Cake Decorating meetings, finishing some UFO's
 handing over the DD's Wedding Quilt, 
and the much anticipated arrival of Tamsin Harvey's book
'Constantinople Quilts'
NOW I can start DS#1's Wedding Quilt!


June
I dusted off my Brother Scan 'n Cut and started preparing the applique for 
DS#1's Quilt 'Istanbul'
and hoping to have it finished by their next Wedding Anniversary...


July
Mariner's Compass is finally finished and entered in Quilt Showcase.

White Glove duty gave me the opportunity to talk to some top quilters about the issues I was having with my 'Istanbul' Applique Quilt - their advice was invaluable!


August
 Road trips were the order of the day for August 
with trips to the Yarra Valley and Phillip Island


September
Not much happened as my MOJO went missing 
in the search for the perfect shade of Green


October
Finally able to make a start on 'Istanbul' for DS & DDIL
and some serious gardening at the DD's place


November
Poppies for Remembrance at the Whittlesea Show,
More Applique on Istanbul 
and
Getting up close with with 'The Girls'
an awesome experience helping with DD's first Honey harvest.


December
I can't credit that I haven't posted anything this December, 
I am sure I must have been busy seeing it was Christmas
So here is my December post!

December was Hot - Very Hot
(Today's top 40c - that's 104F)


I had to wait for a cool change so I could bake the Mince Pies
-Trying a new recipe -


Made some Lactose Free Coffee Ice cream


Then of course there was Christmas with family and friends ...


Bushfires in The Otway Ranges - 
Where the Mountains meet the Sea are keeping our CFA Firefighters busy..
and as the headlines predicted...


Finally, there is one thing that was NOT on the 'to do' list...

The Family "Christmas Curse" has struck again!
This time it was my turn with a serious steam scald on my wrist.


So that is it for December 2015
but I'll just leave you with a photo of something
 I 'snapped' in the Supermarket today...


Yes - I kid you not
Hot Cross Buns!

* * *
Thanks for visiting my corner of the World
See you in 2016


18 November 2015

WOW - That was AMAZING . . .

It was hot and a little uncomfortable, my outfit didn't fit and I had a buzzing sound in my ears but I would not have missed this for anything!

I got to visit "The Girls" up close and very personal!

* * * * *


In fact I was helping my DD inspect her Bee Hive.

A task that has to be done regularly to ensure the health of the hive and the Bees.


(Not totally sure about her choice of footwear - maybe they are "Special" socks!)


This time it was different as it was a Full inspection - right down into the bottom brood box


Checking the frames one by one
I got a lesson on what each part of the hive was..

I commented to her as I was taking these photographs that it was amazing what you can do when you trust your equipment


Fully encased in the SIL's Bee Suit,
I wasn't nervous at all.


Some of the racks were REALLY heavy ...

And full of beautiful golden HONEY.


They say there is nothing like the taste of your first honey harvest

Ohhhhh YUM -

How can I describe it?

Delicate, yet with a Strong Red Gum flavour and a massive kick of Lemon.

or just simply AMAZING!


12 November 2015

You know you're in trouble when ....

The Quilt Police says "Take a Break" ....


... and if you don't
I'll just sit here and look cute until you do!


The odd thing about this is - Spike just doesn't jump up on the benches or tables - so sitting on my ironing board/work bench is VERY unusual!
Maybe I should take that break!

* * *

Before I was interrupted I was about to place the 4th applique spray onto my Istanbul Quilt centre.

It looks good sitting on the applique mat


But transferring all those  pieces which are so delicately held together isn't easy

And I have decided not to mark the quilt fabric with anything but some tacked in registration lines (see previous post).


A simple way around this is, with the template underneath, mark some key points through the fabric with pins ..


Then just position the flowers up against the corresponding pins and press!


And now I am ready to keep stitching...
(Interruptions permitting!)


11 November 2015

Whittlesea Show 2015

Founded in 1859, The Whittlesea Show is said to be the oldest and largest 2 day Agricultural show in Victoria. Each year the Cake Decorators Association of Victoria (Diamond Valley Branch) comes along to demonstrate to the children.. and interested 'grown-ups'.


Hmm... it seemed that our audience was distracted by the roving Balloon Artist -
- who was making his own kind of flowers!


Each year the show has a theme.  This year was the commemoration of the ANZAC Centenary. So we chose to make Poppies.


Poppies take a lot of time and concentration to make, something you just don't have on a day like this...

(If you'd like to have a go, you can find tutorials online. I am looking forward to trying this one!)

...so how DO you make a Poppy in less than 3 minutes flat?


You start with some very simple tools and ingredients:


Rollout some Red Fondant and cut a simple flower


Flute the edges with a 'frilling tool' - or as I told the audience- a Japanese chopstick, Knitting needle, toothpick anything with a tapered end will do.

And of course we had to have something to stick the Poppies on, something that was quick, inexpensive and yummy - so what was The Essential Ingredient?

Lollypops!


A little water painted onto the Lollypop is all you need to get an instant 'glue'.
Then a ball of Chocolate Brown fondant for the flower centre.
A couple of pokes and a little humour .....

And in no time at all you have a "Lolly-Poppy".

The kids loved them and were reminded of the significance of the little flower with each one that was *handed out - all 700 of them!


Lest we forget!


*Footnote:  All ingredients and time were donated and the Lollypops were given freely (on the proviso that the child watched the demonstration) ...  we were VERY tired by the end of the Show but have all 'signed up' for next year!


15 October 2015

Istanbul

Now that all the applique pieces have been cut out it is time to get on with the Quilt!

I have divided my whole cloth into 8 sections and marked a circle in the centre to give me a starting point and also prevent things from creeping into the middle.

Then carefully ironed the first section in place.

Now to choose the embroidery threads....
As you can see I have quite a stash. The result of coming across a shop that had been bought "lock, stock and barrel" by someone who had no interest in craft and just wanted to clear everything out ASAP.

Although I have had these for quite some time, they have been stored in Photo Archive boxes and are still quite sound.  The only exception being the Red which I will replace with some new skeins.

I also decided to make a new project specific pincushion.

Strips of each of the applique fabrics sewn together and embellished with some machine deco stitches.

I also placed a piece of ply (cut to size) inside the pincushion before stuffing so it had a flat and stable base.
So much easier to migrate around the house or balance on the arm of the chair.

I can now keep my threads on the respective colours eliminating the risk of picking up the wrong skein.
I also decided to use 1 needle per colour, so I can keep sewing without rethreading for the sake of six inches of buttonhole stitching!

Now that I am organised - it should just be a matter of getting comfortable and get stitching.

And to keep me from getting distracted....

It is booked in for custom quilting early February!


14 October 2015

Now where was I?

Now that I have my Mo-jo (and Microsoft Picture Manager) back I will attempt to share my adventures with my Scan-n-cut so far ...

The Scan-n-cut was bought to help with the monotonous tasks of cutting out multiples of applique shapes - hopefully to save my hands as well as my sanity.

All these cut and ready to fuse in 3 and a half minutes!
(Well, maybe not quite THAT quick!)

For this project I am doing raw-edge fusible applique using "Applifix".
I have scanned each of my pieces and then multiplied them by the number required for the 8 repeats needed.

Then it was a simple matter of tweaking the individual pieces into the most economical configuration for both printing/cutting and saving fabric waste.

I have learnt that if you are not 100% confident that your pattern will fit on your fabric (especially if you are working on an off cut) the best thing to do is change to the pen tool and draw the pattern before cutting it out.

Also - if the fabric twists while being cut.
Stop the machine, swap over the blade for a pen and continue by drawing the pattern - you can cut it out / fix it with scissors later.

Like so many other techniques, it takes a bit of time to perfect, but when I was able to cut out and bag up an entire quilt's worth of applique pieces ready to fuse in less than a day - I can see that it was worth spending that time.

And the bonus is, now the pattern is saved in the machine's memory I can repeat each element or part thereof over and over, should I wish to make another of these quilts, or matching cushions/table runner ...

What am I thinking?? - Let's just get this one finished first!


12 October 2015

When I'm not quilting .. or blogging ...

I am helping my DD and her BF-Fi with their Gardens.

Establishing a new garden from scratch has it's challenges - and in this case removing the rather thick waste concrete from the new drive and paths that was dumped on the front lawn space.


Then of course the 'native vegetation' aka WEEDS needed to be dug out before soil could be delivered and shifted into the newly formed garden beds.


(Sorry - no photos of the 8 meters of garden soil, it was an impressive pile of dirt!)


Once we had totally exhausted ourselves at BF-Fi's place it was around the corner to the DD's where a little maintenance was needed in her garden.

...um Where did I put my mower?

Just as well I bought myself a 'new toy' and DS#2 was more than happy to play with it.
This is what we are up against when you build on what was a cattle/dairy farm ... it is beautiful, lush and a darn shame to be hacking it down.

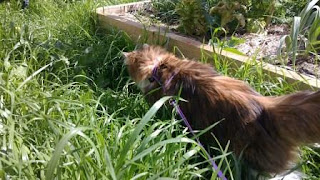
Out the back was no better and the Veggie garden was inaccessible by all but the brave -

Even Artemis the Huntress wasn't game enough to venture too far into the jungle...

So more hacking,
slashing,
pulling
and mowing later we were finally able to find ....


The BBQ!

and one of the most appreciated members of the working Bee

- The Chef!


Is it all worth it?


Of course it is!

especially when you can delight in the sight of a beautiful crop of Heritage Broad Beans, grown from seed and pollinated by your own Bees.